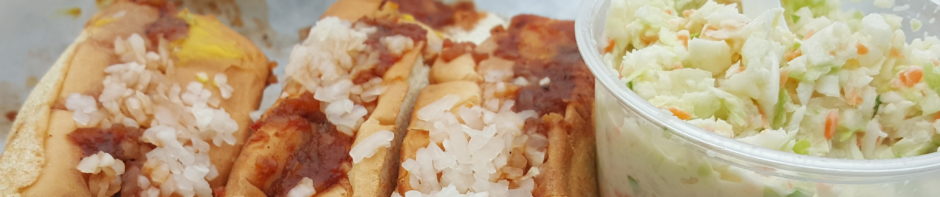
Why Frisco is the official cocktail of Burnt My Fingers

Frisco Cocktail Setup

The essential components of a Frisco, the official cocktail of Burnt My Fingers. Not shown: optional lemon twist.

Yes, we like cask strength Islays. Yes, we love a good IPA with an ABV of 7% of higher. But when it comes to a mixed drink, we have officially anointed the Frisco the official cocktail of Burnt My Fingers.

Frisco what, you say? We first heard of the Frisco from Lew Bryson, a whiskey maven (he’s senior drinks editor for the Daily Beast) who used to reside in our area and now lives in Bucks County, PA. He praised a cocktail which as I recall contained 2.25 oz bourbon and .75 oz Benedictine, shaken with ice then strained with a twist of lemon added at the end. Sounded good to us so we went out and picked up a bottle of Benedictine, an herbal concoction which is one of the less expensive liqueurs, and a supply of our favorite Evan Williams bourbon.

In making the drink we are frankly a little lazy with the details. We don’t use lemon unless there is one lying around nearby and we will either put an ice cube in the glass or just drink it room temperature. What you get is a very pleasant alternative to just drinking the bourbon straight: a bit herbal, a tetch sweet, something special to end the day.

Google Frisco cocktaill and you won’t find a lot, which pleases us. The origin of the cocktail is unclear and it was originally made with rye apparently, but Benedictine + Evan is a felicitous combination. And was it named for San Francisco, or as a dig to the natives who hate it when you call their city Frisco? Unclear. But the drink is solid, so give it a try.

Posted in Drinking, Eating | Tagged , , | 2 Comments

Recipe: Bombay Mahal Channa Masala (vegan chickpea stew)

Channa Masala

Bombay Mahal Channa Masala, just about ready to serve

Bombay Mahal is the oldest Indian restaurant in Maine, founded in the 1990s, and the proprietors were kind enough to share their recipe and cooking techniques in a virtual Yelp class. It’s hard to find a more virtuous dish than channa masala: it’s nutritious, cheap, filling and with this recipe delicious. Makes about 4 main dish servings or more if you serve with other dishes.

Ingredients:
3 T neutral vegetable oil
1 T cumin seeds
1 large white onion, finely chopped
1 T ginger, peeled and finely chopped
1 T garlic, peeled and finely chopped
½ t turmeric
½ t coriander powder
½ t cumin powder
½ t salt or more to taste
½ t ground cayenne or more to taste
1 large tomato, cored and seeded and finely chopped
1-2 c water at room temperature*
2 c cooked chickpeas from 16-oz can, drained, or equivalent amount of chickpeas cooked from scratch (save the liquid for aquafaba)
1 large potato, peeled and boiled till just tender then cut into 1 inch cubes
1 t garam masala
1 T finely chopped cilantro

Method: heat the oil in a medium saucepan over medium heat and add cumin seeds; fry and stir for a minute until they become fragrant and start to pop. Add most of the onion and fry until translucent but not browned. Add turmeric, coriander powder and cumin powder and fry a minute or two to release flavor. (The recipe takes less than half an hour from start to finish but each step is very deliberate. Add ingredients, let them develop flavor or blend with other ingredients, then add more.)

Yelp Zoom Class

Our Yelp virtual cooking class in progress.

Add tomato and 2 T water, lower heat and cover and simmer a few minutes to blend flavors. Add chickpeas, potato, garam masala and ½ T chopped cilantro and cook a few minutes. The sauce should thicken somewhat into a gravy vs a soup. Serve in bowls with a garnish of remaining chopped onion and cilantro; serve yogurt, naan and/or rice on the side if you like.

*The original recipe calls for 2 cups of water but I found that made a recipe which was more soup than stew. Recommend starting with 1 c (plus the 2 T earlier in the recipe) and adding more if needed.

Posted in Eating, Mains, Recipes | Tagged , , | Leave a comment

Recipe: Extra-Tangy Sourdough Bread

Extra Tangy Sourdough Bread

Extra-Tangy Sourdough Bread.

Extra-Tangy Sourdough is based on this recipe from King Arthur Flour; our ingredients are the same but the method is somewhat different. If you follow our bread recipes you’ll notice some similarities to our Instant Pot bread: the hydration is unusually low and it starts with a large preferment which makes up most of the volume of the final dough. These recipes are an attempt to recreate the tart loaves of Larraburu*, a long-departed San Francisco institution. Makes two 1 ½ loaves.

Ingredients:
1 c (227g) lively sourdough starter @60%
1 ½ c (340g) lukewarm water
5 c (602 g) all purpose flour
2 ½ t salt

Extra Tangy Sourdough Bread

Extra Tangy Sourdough Bread crumb closeup: the crumb is fairly open even though hydration is quite low for sourdough bread.

Method: combine the starter, water and 3 c (362g) flour and mix thoroughly; really beat it for a minute or two. (This slightly raises the temperature, which is part of the proofing technique of the Instant Pot bread, and you are welcome to do the first proofing in the IP if you like.) Cover and proof at room temperature or higher for at least 4 hours until lots of bubbles form. Refrigerate overnight, then add remaining flour and salt and knead to form a cohesive dough with good gluten development.

Proof at room temperature for several hours until the dough becomes puffy; King Arthur wants you to do an hourly stretch and fold and this certainly can’t hurt. Divide the loaves into balls, rest 20 minutes, then shape and transfer to bannetons. From this point the bread should be ready to bake fairly quickly. Check after an hour by pressing a finger into the dough; when it bounces back slowly the dough is almost ready to bake. Preheat oven with two dutch ovens to 500 degrees for 30 minutes then load the bread and cover. Bake for 20 minutes then remove cover and turn heat down to 440 degrees. Bake another 20 minutes until the crust is golden brown and the interior temperature is 206 degrees or close to it. Transfer the finished loaves to wire racks and cool before slicing.

*This thread on The Fresh Loaf has quite a discussion of Larraburu, which was one of the original San Francisco sourdoughs, including input from the granddaughter of the owner, and techniques for potentially recreating its extreme sourness. For some reason I had associated Larraburu with the wonderful sourdough smell that would greet you if as you came into San Francisco from the south on US 101, but turns out the bakery was actually in the Richmond district. I’d love to know what the freeway bakery was—the aroma would hit you around the Vermont St exit—if anybody can help.

If you want to know more about San Francisco sourdough, this 1987 article from the New York Times archive is a delightful overview of San Francisco bakeries old and new.

Posted in Baking and Baked Goods, Eating, Recipes | Tagged , , , | Leave a comment

Best and worst online cooking and drinking classes

Kenji Japanese Souffle Pancakes

Kenji’s Japanese Soufflé Pancake Class, an “experience” from Airbnb.

Like you, I have spent a lot of time in this past year eating and drinking with strangers through online classes and tastings. Maybe the best so far was Kenji’s Japanese soufflé pancake class which I attended with my daughter last weekend (it was a gift, accompanying the whisk that was used in the class). This was through Airbnb, which dubs these sessions “experiences” equivalent to travel and other non-virtual experiences. (Craft classes and storytelling are among non-food offerings available.)

The class was small, 8 Zoom windows total with couples in most of them. Kenji asked each of us about our favorite Japanese food (mine was uni, of course) and then gave us tips on where and how to experience that dish if we should visit Japan. Right away, we experienced a connection with the host and each other. And soufflé pancakes are an ideal dish to learn to make in this setting because the concept is simple but it’s all in the execution; Kenji checked our progress at each stage (we showed him our results through our webcams) and told us when to add more liquid, how much to beat the meringue and how to steam the dough. We had a good time and learned a new skill, and it was a fine bargain at $18. Note: the recipe and technique are included in this video on Kenji’s YouTube channel, but it’s much more engaging to experience live.

King Arthur’s Baking School, which has often shown up in the posts I’ve written on my classes with Jeffrey Hamelman, is doing something similar in short and several-day classes for serious home as well as professional bakers. Each student’s workbench is visible to the instructor through their webcam, and there is a second instructor on hand to troubleshoot. These classes are sold out for months to come, but they offered up a sample in this apple cream pie tutorial which is loaded with tips like how to reliably measure flour when the recipe is in grams but all you have is cups.

DZ Restaurants, an upscale dining group with several restaurants in my town, has been doing online cooking classes which feature a chef from their restaurant making one specific dish while students follow along at home using a meal kit that was picked up or delivered from the restaurant. This link has promo trailers for two of their recent classes. Like Kenji’s soufflé pancakes, the ideal subjects for these menus are dishes that are not particularly hard to make but students are not likely to have made at home. It’s a really smart way for restaurants to stay in touch with their customers, and maybe attract new customers, during a period where in-person dining is prohibited or limited.

Martha Stewart Wine Tasting

Martha Stewart drinks with her friend from Wine Insiders at the virtual tasting event. Sadly, Snoop Dogg was not in attendance.

My favorite online drinking class was this pre-Thanksgiving wine tutorial from Wine Insiders, because why drink alone when you can drink with Martha Stewart? It was free with a half-case of wines intended for pairing with typical holiday dishes, and though it was a one-way experience you felt involved because you had the same wine and were drinking it together. (And there was plenty left over for the meal the next day). I’ve attended a couple of other wine classes that were done as fundraisers, where you drank a bottle of wine with other supporters of a cause while you learned more about the cause, and the wine. And the Beer Advocate Extreme Beer Fest, which moved online this year. I’ve never experienced the live version in Boston, but imagine it was more enjoyable to have a whole bottle or can at home than to stand in long lines waiting with your tasting glass.

Not all online classes are seamless and flub-free, of course, and not all good chefs are good presenters. Here’s the Happy Bellyfish class where I made Kimchi according to the recipe we published on Burnt My Fingers. Prepare the ingredients, watch the video and you can have the same experience we did. The presenter spends a great deal of her time responding to questions in her Facebook Live feed, which I don’t think is a good choice because the questions tend to reflect a wide range of skill levels and some were from people who just weren’t paying attention. But the breadth of fermentation workshops offered by these interesting folks (a household in Germany apparently including a Russian, an Indian and a Palestinian activist) is tempting and worth checking out.

I won’t mind the experience of more live dining and perhaps live workshops when the time comes, but these online classes have filled in very nicely during the pandemic. And now that we’ve all become expert Zoomers and WFH-ers I expect they will continue to proliferate after we open up, which is not a bad thing.

Posted in Cooking, Eating | Tagged , , , | Leave a comment

Recipe: Restaurant-Style Italian Dressing from scratch

Restaurant Style Italian Dressing

Restaurant Style Italian Dressing.

There’s a reason your home-made Italian dressing is not as good as the savory stuff in your favorite red sauce place. Restaurant-style Italian dressing has two secrets, one in the ingredients and the other in the technique, and we reveal both of them below. Makes a little less than 3/4 c, enough for one huge salad or two mediums.

Ingredients:
½ c olive oil (extra virgin preferred but not required)
3 T red wine vinegar (use the cheap stuff, like Cora brand)
½ t Kosher salt
½ t sugar (!)
½ t dried oregano, crumbled with your fingertips
¼ t ground black pepper

Italian Salad

Some of our favorite salad ingredients (not all red sauce-traditional) are arugula, cucumbers, feta and a crouton or two.

Method: mix dry ingredients in vinegar and allow to macerate several minutes (!) so oregano reconstitutes somewhat and salt and sugar are dissolved. Add oil and shake well. Keeps indefinitely but remember to shake well each time before dressing salad.

Posted in Condiments, Eating, Recipes, Sides | Tagged , | 4 Comments

Food for Thought: The Casual Sourdough Baker

Everyday Sourdough Bread

Everyday Sourdough Bread, from The Casual Sourdough Baker blog.

The King Arthur Flour website is always a good resource for recipes and baking tips, but PJ Hamel’s blog The Casual Sourdough Baker is especially welcome in these times. As she puts it, “I’ve always been a rather casual baker. When I see a recipe for a spectacularly decorated cake or intricate lattice pie crust, I run the other way — fast.
I used to feel the same way about sourdough. All that terminology; so many rules! But everything changed last spring, when commercial yeast suddenly became scarce. I bake all my family’s bread; what if I run out of yeast? But with flour, water, salt, and homegrown sourdough starter, wonderful bread is just a few easy steps away. Still, I bridle against following The Sourdough Rules; I’d rather skip right to the yummy sandwich loaves and pizza and rolls (and cake).”

Bread Machine Sourdough Bread

Bread Machine Sourdough Bread

Not sure what “rules” are so confining (maybe measuring in grams instead of cups and teaspoons?) but the explorations and discoveries of a seasoned home baker are welcome. I especially liked her piece on baking sourdough loaves in the bread machine, though most of the recipes (but not this one) cheat with commercial yeast.

For your first exploration of The Casual Sourdough Baker, a good place to start is the post on Everyday Sourdough Bread. It contains a wealth of how-to pictures as well as a solid recipe. Check it out!

Posted in Baking and Baked Goods, Cooking | Tagged , , | Leave a comment

Recipe: Covid Pizza Dough

Covid Pizza Dough

Covid Pizza Dough after initial rise and punch-down.

Covid Pizza Dough won’t give you Covid, nor will it cure Covid as far as I know. The title reflects the stultifying new normal when the days run together and you are too lazy to go upstairs where you keep your baking notes. It is an easy to remember formula following Jon in Albany’s precept that a pizza dough should be at 62% hydration, and as a bonus you will end up with a clean kitchen when you are done. Makes ~2 pounds of dough, enough for 2 medium or 3 individual pies.

Ingredients:
310 g water, warmed to body temperature
1 t active dry yeast
Scant 2 t Kosher salt
500 g all purpose flour (or 00 flour if you have it)

Method: bloom the yeast in the warm water for a few minutes in a bowl, then add flour and salt. Mix roughly with a spoon and autolyze for 15 minutes or more. Turn out onto a floured bench and knead with your hands for at least 7 minutes. As you go, incorporate the flour left in the bowl and the flour that sticks to the bench. (Scrape it up with the edge of a chef’s knife.) At the end of the knead, your goal is to have a virtually clean counter and bowl because all the flour has gone into the dough.

Covid Pizza Dough in Bag

Covid pizza dough in the bag after 24 hours, looking good

Put the dough back in the bowl, cover, and rise an hour or two till it starts to expand significantly. Transfer to a ziploc®™ bag and toss in the refrigerator. Leave it at least 24 hours and as long as 4 or 5 days. When you are ready to make pizza, bring it out and divide into sections of equal weight. Make pizzas according to your usual process and if there is any dough left over toss it back into the refrigerator for another day.

We will be using this dough to try to correct the many mistakes in our previous attempt at making a Frank Pepe’s-style pie. Stay tuned.

Posted in Baking and Baked Goods, Eating, Recipes | Tagged , , , | 5 Comments

Recipe: Montreal Vinegar Slaw

Montreal Vinegar Slaw

Montreal Vinegar Slaw.

Montreal vinegar slaw is just what you need to cut the fat when you are eating Montreal smoked meats (a version of pastrami, though I don’t think you are supposed to call it that) and poutine as served at a local place celebrating Montreal Month. Adapted from this recipe, which appeared in the Washington Post back in 2007. Makes quite a bit, maybe 16 servings.

Ingredients:
1 medium head green cabbage, shredded
1 T Kosher salt
4 medium carrots, peeled and coarsely grated, about 2 c
½ green bell pepper, pith and seeds removed, coarsely chopped
½ red bell pepper, pith and seeds removed, coarsely chopped
4 T white wine vinegar
1 T sugar
½ t ground pepper
½ t Kosher salt
2 T neutral oil
4 green onions, cut in half lengthwise then coarsely chopped, including some of the green, about ½ c

Method: place the shredded cabbage in a large bowl and add 1 T Kosher salt. Work the salt in with your fingers so it contacts all services. Rest for half an hour to two hours till the cabbage has wilted slightly and begun to throw off liquid. Transfer to a colander, rinse thoroughly to remove salt, then squeeze out most of the water with a kitchen towel pressed into the top surface.

Mix sugar, salt and pepper with white vinegar and stir till solids are dissolved; add oil and mix. Add cabbage, carrots, red and green peppers and mix to distribute dressing. Refrigerate for at least an hour then taste for seasoning; we found it needed more salt and black pepper. Mix in green onions just before serving.

Posted in Eating, Recipes, Sides | Tagged , , , , | 5 Comments

How to find hot spots in your oven

Find Hot Spots in Oven with Biscuits

Top and middle rows of biscuits after our hot spot test.

I fell into a deep slumber during The Weekend’s LV Super Bowl halftime show and badly overcooked my Oven-Roasted Buffalo Wings. The wings on the bottom rack were salvageable but those on the top shelf were literally toast. This motivated me to mount an experiment to identify the different heat zones in my new BlueStar oven.

Bottom Rack Biscuits

Bottom rack biscuits from oven hot zone test.

I bought a couple tubes of those pop-and-bake biscuits and a dozen Simpson plates from Lowe’s. (They are used in construction to strengthen a joint where two boards are connected.) One biscuit went on each of 12 plates which were labeled as to shelf (top, middle, bottom) and corner of the oven. I then followed the directions on the package and cooked my biscuits for 13 minutes. The results are in the pictures. Top got the darkest, then middle, then bottom. (There are some more subtle differences like top right being darker than top left, which may get further investigation in time.)

Next I got my laser thermometer gun (affiliate link) and spot-checked the temps in roughly the same corners. (Rough is the operative word: I aimed it as best I could but may have picked up rack vs a section of the wall of the oven, and the experiment was definitely skewed by repeatedly opening and closing the oven door.) Back is hotter than front by a significant amount in every case: well over 400 degrees F for an oven set to 400 degrees in the back, well under 400 in the front.

The laser gun measurements don’t correspond in any way to the results of the biscuit test, suggesting it’s the air circulation inside the oven (and I’m talking the natural circulation with help from the BlueStar’s fan, because the convection was not turned on) that makes the difference as to hot spots. (The big oven in the BlueStar has the ability to load an entire sheet tray in the slots which are normally used for the racks, which will certainly have an effect on air circulation. Looking forward to another experiment with this.)

The best news in this test is the lack of hot spots where one area of the oven is much hotter than the rest. I now have a broad understanding that in my oven the higher you go, the hotter you will get. Most items will go on the middle rack, the bottom will be reserved for slow cooking (the rack rolls out on bearings, making it easy to load a heavy pot) and the top for quick heating.

So, try this test in your own oven. The biscuits are cheap and the Simpson plates were less than a buck apiece and can certainly be used for something else (maybe even a construction project) in the future.

P.S. Tom Thibeault of BlueStar told me the hottest spots are the top front and the bottom back. My test doesn’t bear this out. It’s not surprising that two hand-assembled ranges from the same manufacturer would have different hot zones, another reason to do your own test.

Posted in Cooking | Tagged , | 3 Comments

Share recipes, not COVID, during the Super Bowl

COVID wings look like regular, except you get to eat them all by yourself.

COVID wings! The CDC is recommending we celebrate Super Bowl Sunday with as many virtual activities as possible, such as sharing recipes for wings and other snacks, vs getting together in person and yelling in one another’s faces. Sounds good to us. We have repeatedly published tips for cooking and saucing wings, both Buffalo- and Korean-style. Here’s a reference guides to past posts, which we’re offering up today because some of these methods require a 24 hour lead time for brining.

Oven-Baked Wings Taste Test. Can you enjoy greasy, finger-licking wings without dredging them in flour and cooking them in oil? Absolutely. This extensive experiment tried a number of oven cooking strategies head to head. Read it first, then head to this post for the results.

Oven-Fried Wings in Baking Powder (Dry) Brine. Another taste test, comparing different formulas for a salt and baking powder dry brine to dry out the skin so it will cook up nice and crisp. Interestingly, we have not done a playoff comparison of the winner from this test and the one above. But you need to brine overnight, so we’ll save this for next year.

Korean Fried Chicken. This recipe will deliver the mouthwatering sweet and salty and spicy delicacies that are suddenly everywhere for good reason. Yet again we present two prep alternatives; we prefer the second, AKA Korean PTA Potluck Chicken, where the wings are sauced in advance so the juices can soak in.

Easy KFC Chicken. The base KFC recipe includes gochujang, which is Korean chili paste. If you don’t have it in your pantry or fridge and can’t get to an Asian market today, here is an alternative that is very close and made with ingredients you probably do have already.

As to the game itself, we’re torn between rooting for KC, because their QB is from Texas, and Tampa, because their QB is a geriatric. We feel the same about the above recipes. Whatever your preference, they’re all good, so you can’t go wrong.

Posted in Cooking, Eating | Tagged , , | Leave a comment