Hacking the Salt & Char Ribeye Cap Steak

Rib Cap Plated

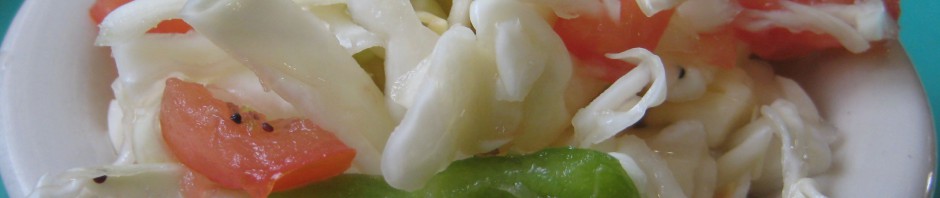
Ribeye Cap Steak, plated, with compound butter

I have long been fascinated by the Salt & Char ribeye cap, from  the high end steakhouse in downtown Saratoga Springs, NY. When Bobby Flay proclaimed it the “best thing I ever ate” on a recent Cooking Channel show, I decided it was time to try making this dish at home. Luckily, it was holiday season and I was able to get a nice deal on a large-end half rib roast at a local market.

Rib Roast Cap On

Rib roast with rib cap on (at right)

The rib cap is a layer of tender, marbled flesh on the outside of the roast, separated from the rib eye by a layer of fat. It’s hard to find at retail because, as my butcher explained, you have to compromise the rest of the roast to harvest it. Luckily I had some compliant diners who were willing to participate in my experiment.

Rib Roast Cap Off

Now the rib cap has been removed and is ready to butterfly, truss and slice.

My rib cap weighed 8 ounces when removed. (Salt & Char advertises theirs as 9 oz. which means they get two servings from a full prime rib. Maybe it comes from a larger cow, or includes more of the interior fat.) Following the technique demonstrated by Chef Braden Reardon on the TV show I butterflied and trussed it, then cut across the roll to create 4 appetizer steaks. I followed the Salt & Char saucing ingredient list to make a compound butter out of beurre noisette (clarified from a 4 oz stick), 1 t chopped fresh rosemary, ¼ c roasted garlic cloves, ¼ c chopped red onion and a bit of salt and pepper. This was pureed with an immersion blender and allowed to harden slightly.

Rib Caps Aged

Mini rib caps ready to cook, after a couple days of refrigerator aging.

The steaks themselves I cooked off in a very hot cast iron skillet with Kosher salt. 2 minutes per side and 5 minutes resting time produced a nice medium rare. The result was very popular: tender with lots of beefy flavor. It probably wasn’t as good as Salt & Char ribeye cap, but it also wasn’t $78, which they charge for the 9 oz rib cap made with Wagyu beef.

And as to the rest of the rib roast, the absence of the rib cap made no difference in presentation or accceptance. It looked and ate like a standard prime rib roast. So, no reason not to try this yourself. Just be sure to leave a full layer of fat on the exterior of the roast so you won’t lose that lovely crispy crust.

Posted in Cooking | Tagged , , , | 2 Comments

Recipe: KFC-Style Black Eyed Pea Salad (AKA Kentucky Caviar)

Black Eyed Pea Salad

KFC-Style Black Eyed Pea Salad

In the South, folks eat black eyed peas around New Years Day for good luck. Thus it occurred to us to take our very popular KFC Three-Bean Salad and modify it for a KFC-Style Black Eyed Pea Salad. The result was beyond satisfactory. Seasoned black eyed peas are often presented as “Texas Caviar” so you might as well call this “Kentucky Caviar”. Makes about 12 servings.

Ingredients:
4 c cooked black eye peas, tender but not soft*
1 t salt
1/4 c chopped red or green bell pepper, or a mixture
1/4 c chopped white or red onion
1/4 c cider vinegar
2 T sugar
3/4 t salt
1/4 t black pepper
1/4 c vegetable oil

Method: place cooked black eyed** peas, chopped peppers and onions in a serving bowl. Add all dry ingredients to a jar, pour in vinegar, shake until sugar and salt are dissolved. Add oil, shake to emulsify, pour over bowl ingredients and mix gently with a spoon. Marinate at least 6 hours before serving, preferably overnight.

*Unless you have fresh black eyed peas available, start with dried. 1/2 pound dried peas will yield 4 cups cooked. Cover dried peas with a generous amount of water in a saucepan, bring to boil, turn off heat and let soak one hour or more. Add 1 t salt and more water to cover if needed, and simmer for 1 hour or until peas are tender but have not become mushy. Cool to room temperature and drain before using in salad.

**By the way, I am using this punctuation rendition because it seems the most accepted on the web, and it’s the name of the pop group. But I really don’t like it. “Black Eyed” implies that somebody put eyes in the peas, or made the existing eyes black, neither of which is true. Also, I’m on the fence as to whether the two words should be hyphenated or even be a single word, eg “blackeye”. Thoughts?

Posted in Recipes, Sides | Tagged , | Leave a comment

Our most popular recipe of 2017 is…

Three bean salad KFC style

Three bean salad KFC style (plus bonus garbanzos)

… The Colonel’s KFC Three-Bean Salad! This copycat recipe edged out perennial favorite Vincent’s Garlic Cole Slaw in cumulative page views over the past few weeks, and the margin is now too great to be reversed. So we’re calling it, four days early.

The source of these clicks is not hard to discern. If you google “KFC three-bean salad” you’ll see our picture at the top of the page, oddly next to someone else’s recipe. Those who try the recipe will be well rewarded for the hunt. It’s got a nice sweet-sour balance that’s just a tad more tart than KFC’s late lamented prep. And though it’s made almost entirely from canned ingredients, the dressing gives it a fresh taste. It’s a painless, delicious way to eat your veggies.

If you haven’t tried it, please make some KFC three-bean salad today and include the bonus garbanzos. Even better, try this modification using black eyed peas. Just the thing to celebrate the new year.

Posted in Eating | Tagged , , | Leave a comment

Recipe: Fermented Beet Pickles

Fermented Beet Pickles

Fermented Beet Pickles

Fermented beet pickles are similar to sauerkraut in texture and flavor profile, but made with beets. (If you’re looking for the traditional sweet beet pickles, here they are.) Toss them in a salad, or serve on a mezze plate with other pickled and prepared things. The optional middle eastern spices add some nice complexity and are highly recommended. Makes 2 pints.

Ingredients:
2 lbs firm red beets, cleaned and peeled
1/4 c kosher, non-iodized salt
1 T cumin seed, optional
1 1/2 t ground sumac, optional

Method: shred the beets with the coarse side of a box grater. Transfer to a glass or ceramic fermenting vessel (a wide mouth canning jar works fine), adding a big spoonful of beets, a small spoonful of salt, repeating until the salt is evenly distributed among all the beet shreds. Press the top layer down and cover with something that is as close to the diameter of the fermenting vessel as possible; a slightly smaller canning jar, with something in it to add weight, is ideal. Cover with a dishtowel and leave in a dark cool place for 3-5 days until fermentation begins and the beets have thrown off some liquid.

Transfer to a bowl (or leave in the jar, if there’s room to really mix the pickles with a big spoon) and mix in some salt water (1 T kosher salt dissolved in 1 pint water) and the optional spices; return to fermentation vessel, press down and continue to add water until top surface of beets is covered. Check daily for fermentation and taste, and spoon off any mold that develops. After another week the beets should be noticeably and pleasantly sour; you can let them ferment a little longer or refrigerate to slow the process. Refrigerated beet pickles should keep a month or more.

VARIATION: substitute 1 T caraway seeds for the cumin and sumac. You now have an eastern European beet pickle you can use to make borscht.

Posted in Recipes, Sides | Tagged , , | Leave a comment

Recipe: Middle Eastern Lentil Salad with Cilantro

Middle Eastern Lentil Salad

Middle Eastern Lentil Salad with Cilantro

Christopher Kimball of Cook’s Illustrated came up with a novel cooking technique for this Middle Eastern Lentil Salad. The lentils are soaked, then cooked in the oven so they maintain their individual identity. This goes well on a mezze platter with some tabbouleh, turnip pickles, hummus and maybe some fermented beets. About 10 small servings.

Ingredients:
1 c lentils (French preferred as they hold their shape better)
4 c hot water
1 T Kosher salt
2 medium carrots, peeled and shredded or chopped, about 3/4 c
1 t ground cumin
1/2 t ground cinnamon
1/8 t cayenne pepper
1 t Kosher salt
2 c chicken broth
5 garlic cloves, peeled and crushed but intact
1 bay leaf
3 T good olive oil
2 T lemon juice
1/4 c chopped cilantro (or mint or shiso or other bitter herb, if you don’t like cilantro)

Method: dissolve 1 T salt in hot water and add lentils; soak for one hour; drain. Meanwhile, toss the carrot with cumin, cinnamon, cayenne and 1 t salt in a serving bowl. Heat oven to 325 degrees. Transfer drained lentils to an oven safe dish; add chicken stock, bay leaf and garlic. Cover and bake 50 minutes or until lentils are tender. Check occasionally and add water if necessary. When lentils are done, remove bay leaf and garlic and pour off any excess liquid. Add to the serving bowl with the carrots and mix thoroughly. (This step will cook the carrots slightly.) When cool, toss with oil and lemon juice and adjust seasoning with salt and pepper as needed, then stir in chopped cilantro. Serve cold or at room temperature.

Posted in Recipes, Sides | Tagged , | Leave a comment

Recipe: Michael Bauer’s Bacon Chex Mix

Chex Mix

Chex Mix, waitin’ for the bacon. This photo was taken by Evan-Amos as a part of Vanamo Media, which creates public domain works for educational purposes.

Though best known as the feared and fussy restaurant critic of the San Francisco Chronicle, Michael Bauer had a midwestern upbringing rich in middle American pleasures like snack mix and bacon. Here, he (actually his mom) combines them in a bacon chex mix that’s perfect for holiday parties. Just don’t leave any out for Santa, because he won’t be able to get back up the chimney. Makes 50 cups, enough for a really big party; leftovers will keep though you might want to refrigerate and reheat before serving.

Ingredients:
7 cups Rice Chex (7 ounces)
7 cups Wheat Chex (11 ounces)
7 cups Corn Chex (7 ounces)
1 box Cheerios (15 ounces)
1 package thin pretzels (9 ounces)
1 can Spanish peanuts (12.5 ounces)
1/3 cup bacon grease
1/2 cup margarine
2 tablespoons Tabasco
1 heaping teaspoon chili powder (with salt)

Method: combine the cereals, pretzels and peanuts in a large roasting pan. Melt bacon grease and margarine (I guess you could use butter but I’d go hard-core and buy real margarine); add Tabasco; pour over dry ingredients and mix thoroughly. Sprinkle on the chili powder and stir again. Bake in a preheated 200 degrees oven for 2 hours, stirring every 20 minutes. Serve slightly warm or at room temperature.

Posted in Recipes, Sides | 2 Comments

Recipe: Panzanella Sandwich, AKA Poor Man’s (or Rich Man’s) Panzanella

Panzanella Sandwich

When is a sub not a sub? When it’s a panzanella sandwich!

Panzanella is a summery Italian salad that features chunks of rustic bread tossed with vegetables and doused in vinaigrette. And guess what? You can get pretty much the same product with a few hacks to your favorite sub to make it a panzanella sandwich. Be sure to have a knife and fork handy, because this is not a sandwich you just pick up and eat.

Ingredients:
Italian Mix Submarine Sandwich with oil-and-vinegar dressing (see ordering instructions below)
Additional red wine vinegar as needed
Additional salt as needed
Additional oregano as needed
Additional olive oil as needed

Method: order your preferred Italian Mix Sub combo with “extra dressing”. This will mean different things depending on where you buy it. I got my base material at Jersey Mike’s, a pretty good chain, where if you order “Mike’s Way” they will shower the sandwich with a liberal amount of oil, vinegar and oregano.

After you get it home, take the sandwich apart and inspect it. Often one side of the bun is left undressed. Lubricate that with extra vinegar, salt and oregano (maybe oil too, but my guess is there is already enough oil on the bread at this point). Wrap it up again and refrigerate several hours or overnight.

For presentation, carefully unwrap the now-sodden sandwich and cut into sections. Serve with knife, fork and plenty of napkins.

Posted in Mains, Recipes | Tagged , , , | Leave a comment

Frozen pizza taste test

Ellio Pizza

Ellio’s pizza modded with anchovies and chopped pickled cherry peppers. Not as good as it looks.

The other day I planned to get take out pizza from DeFazio’s, an excellent source in Troy NY. I somehow overshot the store and decided I would purchase a frozen pizza instead. I should add I had broken my arm a couple days previous and was probably addled by pain/prospect of pain meds at home, because this was not a good decision.

Freschetta Frozen Pizza

Freschetto Pizza with mods

To maximize my options, I stopped at one of the larger Price Chopper stores. Man, they carry a lot of frozen pizza—an entire aisle of it, not counting the pizza rolls in the next case over. I settled on the 5 Italian Cheese Pizza from Freschetta—a brand that promised me real cheese and a “Brick Oven™ Crust” (so now you know who owns the trademark “Brick Oven”, right?). I hacked it with chopped pickled cherry peppers, some anchovies and some leftover cooked spinach and cooked according to package directions.

Ellio's Pizza

Ellio’s three-cut pizza, one of three in the box

The Freschetta pizza turned out okay…on the low end of pizza store quality…except for a strange, pasty crust that seemed not to include yeast. This experience made me curious and I started exploring “best frozen pizza” on the listicle websites. I found a lot of opinions, not much consensus, but I did see some love for Totino’s, a brand I remember liking in my youth.

Totino Party Pizza

Torino’s Party Pizza: not much of a party

I returned to Price Chopper, and discovered the personal size Totino’s Party Pizza (350 calories, 18 g fat) is just $1.25. There’s a code for an Xbox game on the package, so the pizza is effectively free. Feeling like I hit the jackpot, I also picked up a Red Baron Deep Dish Singles (2 for $1.50) and Ellio’s Five Cheese Pizza ($2 for 9 slices). By comparison, the Freschetta had been a stately $5.99.

Red Baron

Red Baron Deep Dish Supreme: just vile

I’ll cut to the chase and tell you I would not consider buying any of these products again, except maybe Ellio’s which is like an inoffensive cheese bread. The Red Baron was a crime against Chicago Style deep dish pizza. (Didn’t they used to sell that frozen, Uno brand, by the way?) The Totino had an interesting crackery crust but an oily topping that smelled and tasted like used motor oil.

It doesn’t seem like it would be hard to make a frozen pizza that’s within a country mile of fresh baked. And some of the reviewers suggested that house brands, like Wegman’s and Trader Joe, may be okay. But there’s no excuse for the products I tried. Their very existence, and the fact they seem to be selling, makes me sad.

Posted in Cooking, Eating | Tagged , , | 6 Comments

Why beer drinkers are so angry these days

New Six Pack Holder

Can you spot the handle on the sixpack holder?

Have you noticed the new sixpack holders? They’re like a cruel practical joke on beer drinkers. Instead of nestling just under the top of the cans, so it’s easy to hook in your finger and carry a sixpack, the loops are halfway down the can. As a result when you pick up your six, the cans fall over the place.

In my other blog we talk from time to time about user interface design. A key principle is that design has to be intuitive. You can’t expect users to figure it out, especially if they’ve had a beer or two. And another thing: see that extra loop on the side of the can? It’s a handle, it turns out. A beer store owner pointed that out to me and said he just noticed several months after the design was introduced. Definitely not intuitive.

Four Pack Holder

Grrr. Makes me angry just looking at it.

Beer drinkers seem to be getting it from all sides. There’s also a new four pack holder, for expensive craft beers. It’s a plastic plate that clamps down on the tops. You literally have to rip the beers out, with an angry tearing sound, before you can drink them. It’s totally against the mellow spirit of enjoying beer.

So the next time you see an angry beer drinker, don’t assume they lost their job or got kicked out of their house. It just could be the user interface design.


Posted in Drinking | Tagged , | 2 Comments

Recipe: King’s Hawaiian Sausage Sliders

Kings Hawaiian Breakfast Sliders

King’s Hawaiian Sausage Sliders. These were heated at 350 degrees which got them a bit brown; I recommend 325 degrees.

King’s Hawaiian Rolls are like regular dinner rolls, but slightly SWEET. I couldn’t resist making sliders from the new four-packs which are just right for a couple’s meal or a single hungry haole. This King’s Hawaiian Sausage Sliders recipe is delicious, but it’s as much a technique as a recipe; please invent your own slider hacks with these adaptable grease pillows.

Ingredients:
1 or more onions, peeled and sliced into rings
1 T olive oil
King’s Hawaiian Rolls, 4-pack (expand the recipe if using larger size)
1/2 lb Jones Dairy Farm Breakfast sausage, sliced into patties and pressed to a size to fit the rolls
8 dill pickle slices
4 slices of your preferred cheese (I used American, because it was on sale)
Mustard
Mayo

King's Hawaiian Rolls

Adorable four-pack of King’s Hawaiian Rolls

Method: preheat oven to 300 degrees. Sauté the onion in olive oil over very low heat till caramelized, 45 minutes or so. Cook the sausage in a skillet over low/medium heat till there is no pink in the center.

Assemble the sliders by cutting the rolls in half crosswise, so there is a top and bottom bun. Squirt a bit of mustard on the lower bun, add a round of sausage, then some cheese, then some pickle, then some onion, with a squirt of mayo on the top. Press down lightly to keep the ingredients in place then transfer to a cookie sheet. Heat in 300 degree oven till cheese is melted, about 25 minutes. (For extra unctuousness wrap the sliders loosely in aluminum foil as they cook.)


Posted in Mains, Recipes | Tagged | 2 Comments