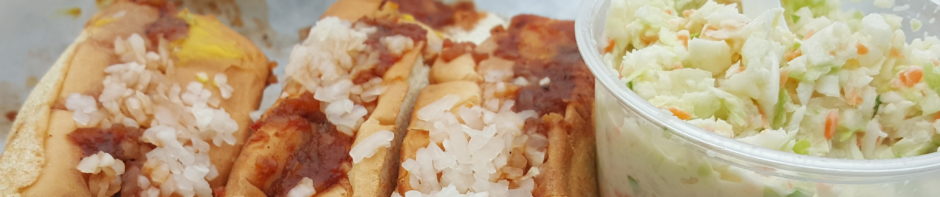
Comfort Classics: Texas potato salad

Texas Potato Salad

Texas Potato Salad

When you run across a bag of potatoes you bought in the early days of the pandemic, and they’re starting to sprout roots, it’s time to make Texas Potato Salad. This is a true comfort classic that goes with any grilled or smoked meat—chicken, brisket, burgers, we’re getting hungry just thinking about it.

You can identify Texas Potato Salad by its signature yellow tone, which comes from the egg yolks and a squirt of yellow mustard. Our recipe is here, but it’s really more like a set of guidelines. You should use white or red potatoes, not russets which will fall apart in cooking. You need celery for crunch, some chopped onions for funk, pickle relish or chopped pickles for tartness and ideally a bit of pimento or roasted red pepper for color. Mediocre potato salad tastes like undercooked or underseasoned potatoes; this should have an assertive, salty-sour taste. However, let it sit for a few hours before you do your final seasoning or add too much vinegar because it will definitely pick up flavor during that time.

Still got potatoes to deal with? Then make German-style potato salad! This relies on bacon and bacon fat, onions which have softened in that fat, a generous amount of cider vinegar and… wait for it… MSG. But don’t worry, the amount you’ll use is about the same as in a couple servings of Hidden Valley Ranch Dressing so your guests shouldn’t have a problem with it. (Of course, you can also leave it out, but we’ve compared and it definitely tastes better with MSG.)

If you’ve STILL got potatoes after all that, make Potato Chip Pizza. Two of a guy’s favorite things in one food! Then go out for some nice solitary exercise and work off all those carbs.

Posted in Cooking, Eating | Tagged , , | Leave a comment

Recipe: Easiest Sourdough Bread

Easiest Sourdough Bread

Easiest sourdough bread topped with sesame seeds (left) and Trader Joe’s Everything But the Bagel seasoning. The latter was a fun idea, but the garlic in the seasoning burned a bit and got bitter.

What makes this the easiest sourdough bread? First, it has a lower ratio of water to flour so it’s easier to handle and less likely to deflate in the oven if you let it proof too long. Second, it relies on a very long rise that takes the place of a lot of kneading. It’s still a great loaf, one of the best we’ve made. Recipe produces two 1 ½ lb loaves, just right for making sandwiches.

Ingredients:
125 g sourdough starter made with all-purpose flour @60%
487 g water
75 g whole wheat flour
675 g all-purpose flour
20 g salt (a little more than a tablespoon of Diamond kosher salt) plus possibly more after tasting
Sesame seeds, poppy seeds or a combination for topping (optional)
Polenta for lining the pan

Method: refresh your starter so it is very lively and full of air bubbles when you begin. Mix starter and water in a large glass bowl till well combined. Add flours and mix until most of the water is absorbed; let it sit (autolyze) at least half an hour or as long as two hours, covered. Add salt and do the first of four stretch-and-folds* half an hour or so apart. (All dough handling with this recipe is on a loose schedule which can be adjusted to accommodate your own schedule.) After a couple of stretch-and-folds taste the dough for salt; if it seems under-salted add a bit more.

Banneton with Seeds

Banneton has ben prepped with seeds for the dough.

After the final stretch and fold the dough should have transformed from a shaggy mess to something with a lot of integrity and tensile strength. Now, cover the bowl tightly with plastic wrap and refrigerate for at least 48 hours. At the end of that time, let the dough come to room temperature (this will take a couple of hours) then shape into ovals, let rest 20 minutes or so, then transfer to oval bannetons. (If you don’t have bannetons you could use a bowl of appropriate size or simply let the loaves proof on the counter covered with a towel.) If using seeds for topping, shake a generous amount into the bottom of the banneton before adding bread; you can retrieve any excess for reuse after the bread goes into the oven.

Let the shaped loaves rise for two hours; the last half hour heat two 5-qt Dutch ovens in a 450 degree oven. Being careful not to burn yourself, transfer the heated pans to a heat proof surface and sprinkle a little cornmeal or polenta on the bottom to prevent sticking and burning.

Turn the proofed loaves, one at a time, into your hand then carefully transfer to the Dutch oven. Score the top—this loaf seems to like one long end-to-end cut—then put the preheated lid on and bake for 20 minutes. After 20 minutes remove the lid and bake another 20 minutes as the bread develops its crust. Check for doneness with a meat thermometer (you want an internal temperature of 206 degrees or a bit higher) or by thumping the loaf and listening for a hollow sound.

Turn out on a counter and allow to cool. If you want some delicious warm sourdough with butter or cheese, it should be ready in 30 minutes. To slice for sandwiches, allow to cool completely.

*Stretch-and-fold and other sourdough basics are explained in detail in this post.

Posted in Baking and Baked Goods, Eating | Tagged , , | Leave a comment

Baking sourdough bread during the pandemic

Sesame Sourdough Bread

Baking sourdough bread during the pandemic results in happy results like this one.

Lots of new folks are finding their way to Burnt My Fingers these days, and many head straight for our post on how to make sourdough bread in your Instant Pot. But it’s a bit of an (intentional) misdirection because we use the IP for proofing, not actual baking. If you want to get serious about baking sourdough bread during the pandemic, there are better places to start.

Do you need a sourdough starter? This post tells you how to get one including buying, borrowing or creating your own from scratch. Or try the paper bag method which seems quirky, but it works. Once you have a lively starter—one that produces bubbles within a few hours of feeding—you’re ready for your first loaf.

This recipe is what we used for years for a basic sourdough bread, and it has all the steps you want to follow plus measurements are in cups, not grams so you don’t need a scale. We later took a few classes at King Arthur’s wonderful baking school in Norwich, VT, and graduated to this more complex recipe which we use day in and day out; we shared it (along with our favorite starter) with a neighbor and she was able to achieve success on her very first loaf.

Our very favorite sourdough recipe? It would have to be this one for olive bread. It’s unusual because it requires a very large amount of rye starter (made the same way as a white flour starter, but with rye flour) but the recipe is not hard to follow and you are going to end up with a loaf you can be proud of.

Sesame Bread LoavesPlease do invest in one special piece of equipment, the Lodge 5-qt dutch oven which will give you professional quality loaves, with a beautiful crust and perfect crumb, in your home oven. You probably shouldn’t attempt baguettes on your first attempt, but when you’re ready check out this post for an equally successful home steaming method for baguettes.

Following all the above advice, we whipped up the sesame sourdough shown at the top which is probably as good a loaf as we’ve made. Try some of the many bread formulas already on the blog, and we’ll share the recipe next time.

Posted in Cooking, Eating | Tagged , , | Leave a comment

Comfort Classics: Better-than-Mounds-Bars

Cashew Coconut Clusters

Cashew Coconut Clusters are better than Mounds Bars. Try some and see for yourself!

Our Cashew Nut Clusters really are better than Mounds Bars! You get the same holy trinity of dark chocolate/coconut/nuts but without the corn syrup and preservatives, and we up the game by using high quality dark chocolate, cashews instead of peanuts, and gently toasted unsweetened coconut. If you like Mounds, you’ll love these, guaranteed. That’s why they are good to have around in these uncertain times.

Trader Joe Pound Plus

Pound Plus dark chocolate bar from Trader Joe’s.

We’ve modified our approach after making these many times. Everything we now use comes from Trader Joe’s where we buy a couple of those big (“Pound Plus”) bars of 72% dark chocolate with the red package, a couple of packages of raw cashew pieces, and a bag of unsweetened coconut slices. Even when the shelves were stripped of peanut butter and snacks, all these items were in stock at our local store.

We make a triple recipe which takes 9 oz of chocolate (each square of the Pound Plus bar is half and ounce so this will take roughly half the package), 2 c cashew pieces and a generous half-cup of the loosely packed coconut shreds. We preheat the oven to 375 degrees and make up a double boiler by floating a metal bowl in a pan of water on the stove to melt the chocolate. The cashews go on a silicone mat on a half-sheet pan and bake for about 7 minutes till they are fragrant and beginning to brown, then we toss the coconut on top and bake for 3-4 minutes until several pieces are starting to color.

The sheet pan comes out of the oven and cools while we wait for the chocolate to completely melt in the double boiler bowl. Then we remove the bowl from the pan and dump in the cashews and coconut using the silicone pad (which is now cool enough to handle) as a chute. Put the pad back on the pan and start making candies, one very generous tablespoon of the chocolate/nut/coconut mixture at a time. You’ll just about fill the half-sheet pan with about 18 candies, each a couple of generous mouthfuls.

Chill in the refrigerator until hard, then transfer to a container which you’ll also keep in the fridge because this chocolate is just a bit melty at room temperature. Then eat one for a low-sugar pick-me-up whenever you need a boost. They really are better than Mounds Bars and the kind of comfort classic we need nowadays. Enjoy.

Posted in Cooking, Eating, Recipes, Sweets | Tagged , , , , | Leave a comment

Recipe: Perfect Egg Cream

Perfect Egg Cream

Perfect Egg Cream. Sorry for the background distractions; we had to move fast to get the shot.

While this recipe is likely to produce a perfect egg cream, we can’t predict how many tries it will take you to get there. The good news is that the failed drinks will taste the same as the good ones so you can painlessly dispose of your mistakes. By the way, everybody talks about the appearance and texture of an egg cream, but what about the taste? Being made mostly of seltzer water, it’s a mild concoction that is especially pleasant on a hot summer day. So don’t feel bad if you have to drink several of them. Makes one egg cream serving (at a time).

Ingredients:
1 part Fox’s U-Bet Chocolate Syrup, preferably Kosher for Passover
2 parts very cold milk (try putting it in the freezer till ice crystals start to form)
4 parts very fresh* seltzer (not club soda or mineral water)

Method: start by pouring maybe 3/4 of an inch of U-Bet in the bottom of a glass, then add double that amount of milk. Add the spoon you will use to stir; it should be long enough to extend over the top of the glass. Now tilt the glass and pour in the seltzer, slowly so it will not form a head.

Overmixed Egg Cream

Overmixed Egg Cream. Note the uniform brown color and imperfect head.

Now comes the magic: place the glass on a flat counter and agitate the spoon vigorously, up and down as much as side to side, stirring at the very bottom but keeping the rest of the glass and ingredients as undisturbed as possible. What will happen (in a perfect egg cream) is that the layers will magically separate so you get syrup and milk on the bottom and a perfect white head on the top. Serve at once, before the head dissipates.

(What is more likely on your first attempts is that you will overstir, so the white foam gets mixed into the drink and the bubbles go away. Drink up and try again.)

*Can’t emphasize VERY FRESH enough. Best to use a soda siphon or start with a fresh can of seltzer for each drink. We used a half-liter bottle and it was losing its fizz by the third drink.

Posted in Drinking | Tagged , , , | 4 Comments

Let’s make Chinese takeout at home!

Sweet and Sour Pork

Chinese Takeout made at home: Sweet and Sour Pork

In upstate New York, almost all Chinese takeout places are currently closed. A local paper surveyed them* and found that most were unable to get standard ingredients, like egg roll wrappers, that are shipped from the NYC area. Hopefully that will change soon, but in the meantime we can make many Chinese-style dishes at home.

Sweet and sour pork is an example. Most of the ingredients are already in your kitchen or available in your local supermarket, even in times of short supply. (If you can’t find rice vinegar, use white or cider vinegar.) Follow our recipe and you’ll end up with a product that is likely better than the takeout dish you’re used to. And, by the way, a little research suggests that while sweet and sour pork is American in origin, it was created by Cantonese in California who were attempting to duplicate a favorite dish from home.

Orchid Noodles

Orchid Noodles after Barbara Tropp–made with Manischewitz Fine Egg Noodles were on sale for the holiday

If you want to get a bit more ambitious—with the ingredients, not the preparation—try Orchid’s Chinese-Style Cold Noodles. This easy cold dish was a potluck favorite, back when we had potlucks. You do need toasted sesame oil, but that’s a common enough ingredient that you should still be able to find it in your local store if you don’t already have a bottle. The rest of the ingredients can be hacked with standard American products though I would really urge you to make the effort to order Chinkiang vinegar from Amazon and wait the few days until it arrives. It’s full of deep flavor, unlike the standard black vinegar you see in Asian markets that’s darkened with molasses.

Try “Chinese” in the search box to find a few more Chinese takeout recipes you can make at home.

*The link will take you not to the article in the Daily Gazette, which has a firewall, but to a blog piece in the Albany Times Union which cites the Gazette piece and adds some interpretation. Read the unfortunate comments (you have to scroll way down past the ads) and you’ll feel some extra globalist pride in making these dishes, in the same way we were going out of our way to eat at Chinese restaurants a few weeks ago.

Posted in Cooking, Eating | Tagged , , , | Leave a comment

Comfort Classics: Lemon Bars

Tangy Lemon Bars

Mom’s Tangy Lemon Bars are a true comfort classic. You can blot the top with a paper towel while still warm to remove the froth, but I like it the way it is.

My mother loved lemon bars, and I would always pick one up at Putnam Market in Saratoga Springs before I got on the plane to visit her at her assisted living facility in Austin. She’d divide the bar and eat half in front of me, then save the rest for a future dessert. It was comforting to watch her eat it, and even more so when she offered me a small taste.

On March 19, one of the last days that food establishments in New York were allowed to serve food on the premises, I sat in the window of Putnam Market and watched the diminished sidewalk scene as I ate a lemon bar all by myself. I thought about my mom, about all the challenges right now, and about how good that bar tasted: a brilliant balance of sweet and sour with almost too much of each.

We published our own lemon bar recipe a while back, and were very satisfied with the results which were quite similar to the Putnam product. If you don’t have access to fresh lemons, you can use Lucy’s bottled lemon juice which is reasonably close in flavor and omit the zest which will affect the texture more than the taste. (Lakewood, the brand we mentioned in the recipe post, is marginally better but harder to find.) Warning: you’re going to end up with a lot of lemon bars so make sure you have some folks available to help you eat them.

Lemon Bars

Lemon Bars after slicing, more than anyone could possibly eat… or is it?

And, we were delighted this week when The Kitchn tried four famous lemon bar recipes—and declared ours the winner! Well, not actually, it was Martha Stewart’s recipe which uses sweetened condensed milk and is definitely worth trying. But when reviewer Amelia Rampe said she was looking for “a sturdy-yet-tender crust” and “a bright lemony filing that strikes the perfect balance between tart and sweet” we were sure she was talking about us.

In fact, all of the recipes she reviewed sound great and depending on how long we are holed up we might make every one of them. Lemon bars are the kind of comfort classic we need right now.

Posted in Eating | Tagged , , , | Leave a comment

The great egg cream controversy

Peter Pan Egg Creak

This beautiful egg cream is from Peter Pan in Greenpoint, Brooklyn. It would not, however, satisfy the purists in the great egg cream controversy. Photo by Vicky Wasik for Serious Eats.

I’m writing the day before Passover and have found, unfortunately, that there is very little availability of the U-Bet Kosher for Passover Chocolate Syrup this year and it is not safe to go from store to store looking for it. So rather than publish a recipe many readers can’t make, we’re going to split this post on the great egg cream controversy into two parts. The technique today, the actual recipe after the holiday.

I have been waiting for my friend Daniel Berman, of the FussyLITTLEblog, to return to the great egg cream controversy. His blog has gone dormant, so we’re going to do our best to pick up the burden.

According to Michael Isaacson, who seems to know something about Jewish culture, “A Genuine Brooklyn Eggcream is a cold, sweet, dark chocolatey drink with a creamy white head.” (Even the “white head” can lead to egg cream controversy, as we’ll see in a moment.*) We’re going to use that description as our goal, rather than doing the usual testing of different ingredients and methods which would kick our taster into hypoglycemia.

First controversy is what kind of chocolate syrup to use. The passionate will say you can only use Fox’s U-Bet Chocolate Syrup and further that you must use the seasonal “Kosher for Passover” version that substitutes cane sugar for corn syrup**. Dissenters will say that you should use Bosco, a product that predates U-Bet and therefore might be the original, or that the tastes of the cane sugar and corn syrup versions are identical, or even that you can use Hershey’s. We are going to stick with U-Bet.

The second egg cream controversy is the order and technique by which the ingredients are combined. The U-Bet folks themselves say you add syrup first, then milk (whole milk, never 2% or skim), then seltzer and stir them with a swirling motion using a long spoon so the bottom ingredients become distributed in the foam on top. Others insist you add the syrup last, and use the spoon to direct it into the glass by creating a channel through the foam in which you will pour it.

The source of the seltzer (never club soda or mineral water) also matters. In a Brooklyn soda fountain it would have been squirted into a glass with enough pressure to move the other ingredients around. If you are pouring from a store bought bottle (which must be absolutely fresh) or can (which some claim produces better results than the bottle, probably because it is opened on the spot so sure to have maximum fizz) you will have to find another way to duplicate the ingredients.

Lavalette Egg Cream

Reader Lynn Lavalette shared her own egg cream on the U-Bet Facebook page. Notice the perfect white foamy head!

We are going to go with Mr. Isaacson’s technique which has a couple of additional subtleties. The milk needs to be almost frozen, to the point that crystals are floating in it, to add creaminess to the finished product. And you need to “bounce the spoon up and down” at the bottom of the glass rather than stirring it. This will mix the syrup and seltzer at the bottom of the glass while the milk (being lighter weight, especially since it is near frozen) rises in a pristine white foam to the top.

Our recipe is here. Good luck!

*Here’s an easy variation which is also delicious and foolproof to make although by the purists it is not an egg cream because it does not have a pure white head. It was served up by Harvey Randall at the Jewish Food Festival in Schenectady NY and I can attest it is delicious. Combine one part Fox U-Bet, two parts cold whole milk and 8 parts seltzer in a wide mouth jar of a size that the ingredients will fill 2/3 of capacity. Seal and shake 20-30 seconds then “pour into small cups” to serve.

**OU Kosher, a company that does Kosher certification, has some background on why cane sugar is Kosher for Passover and corn syrup is not. It’s NOT because corn is Chometz, a fermented (or fermentable) grain which is not allowed in the house during Passover. Rather (thanks Daniel Berman for this correction) corn is Kitniyot, a separate category of prohibited items created at a later date. Of course, corn was unknown in Egypt at the time of the Old Testament.  But corn is a grain and it can indeed be fermented (ask any moonshiner) so a restriction reflecting the Chometz rules would seem appropriate.

Posted in Eating | Tagged , , , | 10 Comments

Comfort Classics: Texas-Style Barbecue Sauce

Texas-Style Barbecue Sauce

Texas-Style Barbecue Sauce, on meatloaf

Comfort Classics is a new feature for our challenging times. We’ll revisit some recipes that have appeared on Burnt My Fingers for easy, reassuring dishes, sides and sauces you can make at home without stress and with ingredients you are likely to find in your grocery store if not your pantry. And what better way to begin than Texas-style barbecue sauce? In Texas you would never eat this on a freshly smoked brisket (Tabasco only, please!) but it’s fine for leftovers in a sandwich and you can use it on all kinds of other meats, such as the meatloaf we tried today and of course hamburgers or hot dogs.

We were trying to replicate the sauce served at Sonny Bryan’s, a joint on Inwood that we grew up with. They make their own sauce and will sell it to you in a jar at the counter; they also made, or sold under their name, a commercial product with a different formula. The latter is not what you want and it’s apparently no longer available. The original sauce had a good sweet-sour balance and a nice smokiness from the cumin. That’s what we are going for here. Check out our Texas-Style Barbecue Sauce and we think you’ll like it.

What other comfort classics have you enjoyed on Burnt My Fingers over the years? Let us know (in the comments or by email) and, if there’s enough interest, we’ll dust them off and take them out for a spin.

P.S. Here is an “original” recipe for Sonny Bryan’s sauce which apparently appeared in Dallas newspapers in the 80s. I like the idea it includes a whole lemon, something I’ve never found a trace of in any jar of Sonny’s sauce. The amount of Worcestershire scares me and makes me think the results might be inedible, but give it a try if you are so inclined.

Posted in Condiments, Recipes | Tagged , , , , | Leave a comment

Food for thought: The Takeout food blog

Takeout Sichuan Asparagus

Sichuan Cumin Asparagus from The Takeout food blog

Judging from our own stats, people are spending a lot of time looking for ideas on things to cook at home. Which is how we discovered The Takeout food blog. This Chicago-based site is where we learned that Alinea, Grant Achatz’ wildly innovative and unbelievably restaurant, is now doing takeout at $35 and $40 for a 3-course meal. Near the top of the front page currently is I’ve cracked the code for Instant Pot caramelized onions, an earnest but questionable method which is as enjoyable for the comments as for the recipe itself.

There’s also a bunch of ideas for using up all those potatoes you brought home in that hoarding frenzy, and a Sichuan Cumin Asparagus recipe we’re definitely going to try though without the recommended air fryer. Actually quite a few of the recipes are a bit fast and loose with the details, like this Make-Do Tartiflette in which the writer eliminates the stinky cheese (Reblochon) which is the key ingredient and then decides what the hell, I’ll change up a few things too. It helps to know the parent company is the publisher of The Onion, though I am 99% sure the recipes on The Takeout are meant to be actually made in your kitchen.

In short, The Takeout food blog is great entertainment, as much for the writing and comments as the food. Just give yourself a reality check before diving into the recipes. Check it out.

Posted in Eating, Food for Thought | Tagged , | Leave a comment